Monday, July 22, 2013

Toe Mah Tee Yos

Toe mah tee yos...that's how you pronounce the star of the following dish: tomatillos! When I saw these at the farmer's market, I knew I had to have them. Tomatillos look like mini green tomatoes, but they are wrapped in husks, which make them look like little tomato gifts. Now, let me remind you in case you forgot, I HATE tomatoes! However, there was something about the tomatillos, and their cute little husk, that made them irresistible. So I snatched them up, without any clue on what to do with these tomato relatives. Thankfully, there's this thing called the Internet (maybe you've heard of it?), so it was easy to find some recipes. I settled on salsa verde; after all, there's nothing quite as good as chips, salsa, and a cold margarita on a hot summer day. 


Salsa Verde


Ingredients:
  • 1 1/2 lb tomatillos
  • 1/2 cup chopped white onion
  • 1/2 cup cilantro leaves
  • 1 Tbsp fresh lime juice
  • 1/4 teaspoon sugar
  • 2 Jalapeño peppers (seeds and membrane removed, to reduce heat, if desired)
  • Salt to taste

Directions:
1. Remove papery husks from tomatillos and rinse well.
2. Cut the tomatillos in half and place cut side down on a foil-lined baking sheet. Place under a broiler for about 5-7 minutes to lightly blacken the skin.
3. Place tomatillos, lime juice, onions, cilantro, chili peppers, sugar in a blender or food processor and pulse until all ingredients are finely chopped and mixed. Season to taste with salt. Cool in refrigerator. Serve with chips or as a salsa accompaniment to Mexican dishes.
In the future, I might add ONE jalapeño....and then add another if it needs more heat. The salsa is really good...but a little too spicy!

And here's the finished product:


Friday, July 19, 2013

Appetizer Things

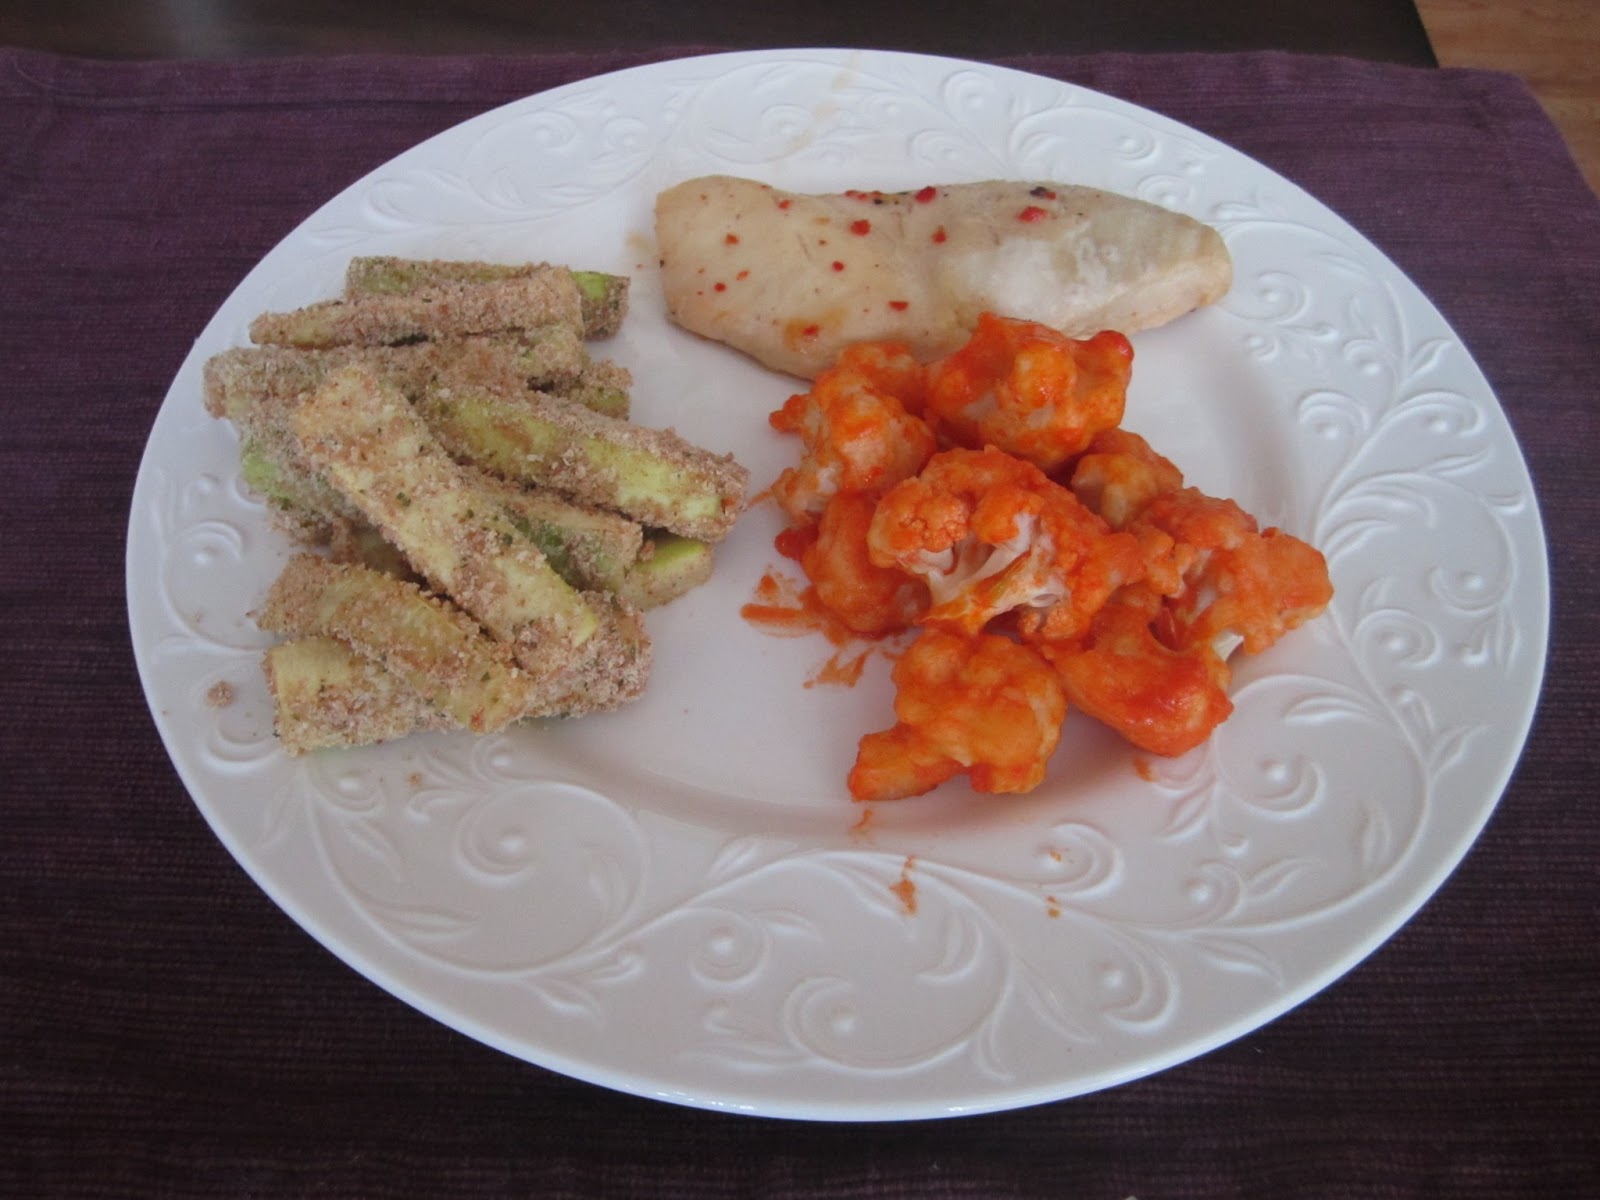
Have you ever made of one those dinners that's just a mix of everything you have left in the refrigerator/freezer? We had one of those types of meals this past week. It's always fun to figure out what to make with the random assortment of foods you find lying around. Here's our hodge podge dinner, featuring cauliflower and zucchini:


We had marinated chicken, buffalo cauliflower, and zucchini fries. The buffalo cauliflower was surprisingly delicious! We are big buffalo chicken fans, and I was a bit skeptical when it came to buffalo cauliflower. There was a flour/water/garlic powder batter that gave the cauliflower a really nice texture...and you can never go wrong with Frank's Red Hot Sauce. 

Zucchini fries...before the oven

Zucchini fries were another easy side to add to our random dinner. I didn't have buttermilk (not a staple in this kitchen) or eggs (expired a few days prior yet still sitting in my fridge...), so the zucchini were dipped in milk, then in breadcrumbs. Baked in the oven for 30 minutes at 350 degrees.

These two random sides would make really good appetizers for a party! They are both very easy to make and are healthy alternatives to some of the more popular appetizers. I would definitely make these again the next time I have a party. Or the next time I crave junk food!

Wednesday, July 17, 2013

CSA Week #7

Here's what came from this past visit to the farmer's market:


Leeks, snap peas, potatoes and lettuce. Stayed tuned for more recipes!

Winnie update: She has started to adjust to her new home! Our neighbor said he didn't hear her at all yesterday while we were at work - wahoo! Whatever we're doing is working. Maybe it's time to quit my job and this whole blogging thing and become a dog whisperer?

Monday, July 15, 2013

CSA Week #5 Recap

Alright, so this post is lacking in pictures. Things have been a bit busy over here @ lizzilnthings! It turns out that super cute and excited behaviors Winnie was exhibiting were signs of separation anxiety :( Poor puppy! We're trying to figure out what is considered "normal' separation anxiety for a dog who was just introduced to a new home, and which behaviors may be not "normal". Any thoughts or suggestions? We've been doing some behavioral adjustments and reinforcing positive behaviors...but Winnie keeps on incessantly howling and crying when we leave. I've been spending all of my free time researching all variations of canine separation anxiety, so I haven't had much time to take pictures or post. I hope this is a good excuse for the delay.

Beets
The beets were delicious - baked in the oven and eaten on salads and with goat cheese. I never had made beets before (confession: I buy them in a can!), so I was not sure how they'd turn out, but it was very easy to bake beets! Wrap in foil, bake at 350 degrees for 30 minutes (longer for bigger beets), until a fork can pierce the beet. When cool, peel, slice and enjoy!

Spinach
Pretty boring preparations - on salads, sautéd with garlic, in wraps. Nothing too exciting or exotic here.

Overall, week #5 was pretty great. All the produce was delicious and I made some new foods (pickles!). Looking forward to picking up my next share tomorrow...and finding time to finish posting about week #6. Yummy recipes to be posted soon...promise!

Friday, July 12, 2013

I Made Pickles, hey hey hey hey!

Cucumbers are one of my favorite vegetables. I love to eat them plain, with a little salt, in salads, or with ranch dressing. When I saw these guys at the farmer's market, I knew it was going to take a lot of strength, on my part, not to eat them immediately. As hard as it was, the cucumbers lasted long enough to be turned into pickles!


A little lesson in pickles: there are two primary ways to make pickles. The first way, which is the method by which the pickles found in groceries stores are made, is much more complicated and is best for making large batches of pickles. This involves pre-soaking cucumbers in brine, and makes pickles with a stronger taste and a longer shelf-life. However, it is worth the time and effort if you find yourself with a large quantity of cucumbers. 

The second method, which I used, is often called "quick pickling" or "refrigerator pickling". Pickles are made by pouring heated pickling liquid (vinegar/water/salt) over cucumbers in a jar, along with various spices. The jar of pickles are then placed in the refrigerator, and in a few hours, you have crunchy and delicious pickles! Unfortunately, refrigerator pickles won't last more than 2 or 3 months, but once you try these, there shouldn't be any problem finishing them before they expire.

Pickling Ingredients
The recipe that was used to make these pickles came from Ted Allen - it was really simple and did not take very long at all to make. It was a little hard waiting for the pickles to cool so that we could eat them, but it was well worth the wait. Pickles, in my opinion, are a great addition to a summer barbecue - so bring on the burgers and dig in!